Curated blog with news, events, listings, jobs and exciting stories about web design & web development.

How To Grow Your Email Marketing List With WPForms & Mailchimp
When it comes to email marketing, Mailchimp is definitely one of the most well-known tools. WPForms, on the other hand, is one of the most popular WordPress form builder plugins. The two together make a powerful combination that allows you to easily create sign-up forms that your audience can use to sign up to your newsletter. All you need is WPForms along with its Mailchimp addon. And a WordPress site, of course.
WPForms – The Beginner Friendly WordPress Form Builder »
WPForms + Mailchimp Addon
If you are already planning to use WPForms for your contact form, we have some good news for you. You don’t have to find a third-party service to grow your email marketing list. WPForms provides a Mailchimp add-on in Plus, Pro, and Elite plans. Let’s find out how to get it up and running in just five simple steps.
Step 1: Create A Mailchimp Subscribe Form

After installing and activating WPForms, head over to WPForms > Addons to install and activate the Mailchimp add-on.
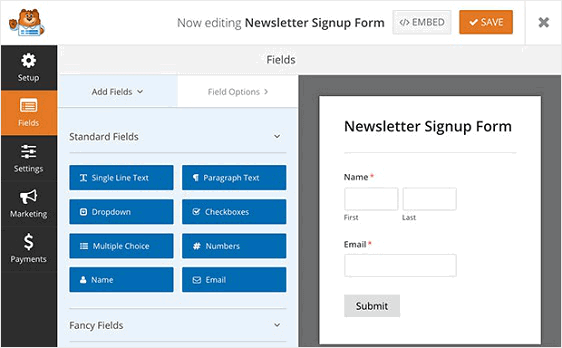
Then create a newsletter subscription form under WPForms > Add New. By the way, you do not have to create this form from scratch, but can use the newsletter subscription form template provided by WPForms. You can then further customize the form via drag and drop to add a GDPR Agreement field for instance. By doing so, you give your website visitors the opportunity to consent to you storing their personal data and sending them email marketing emails. You can even rearrange the order of form fields.
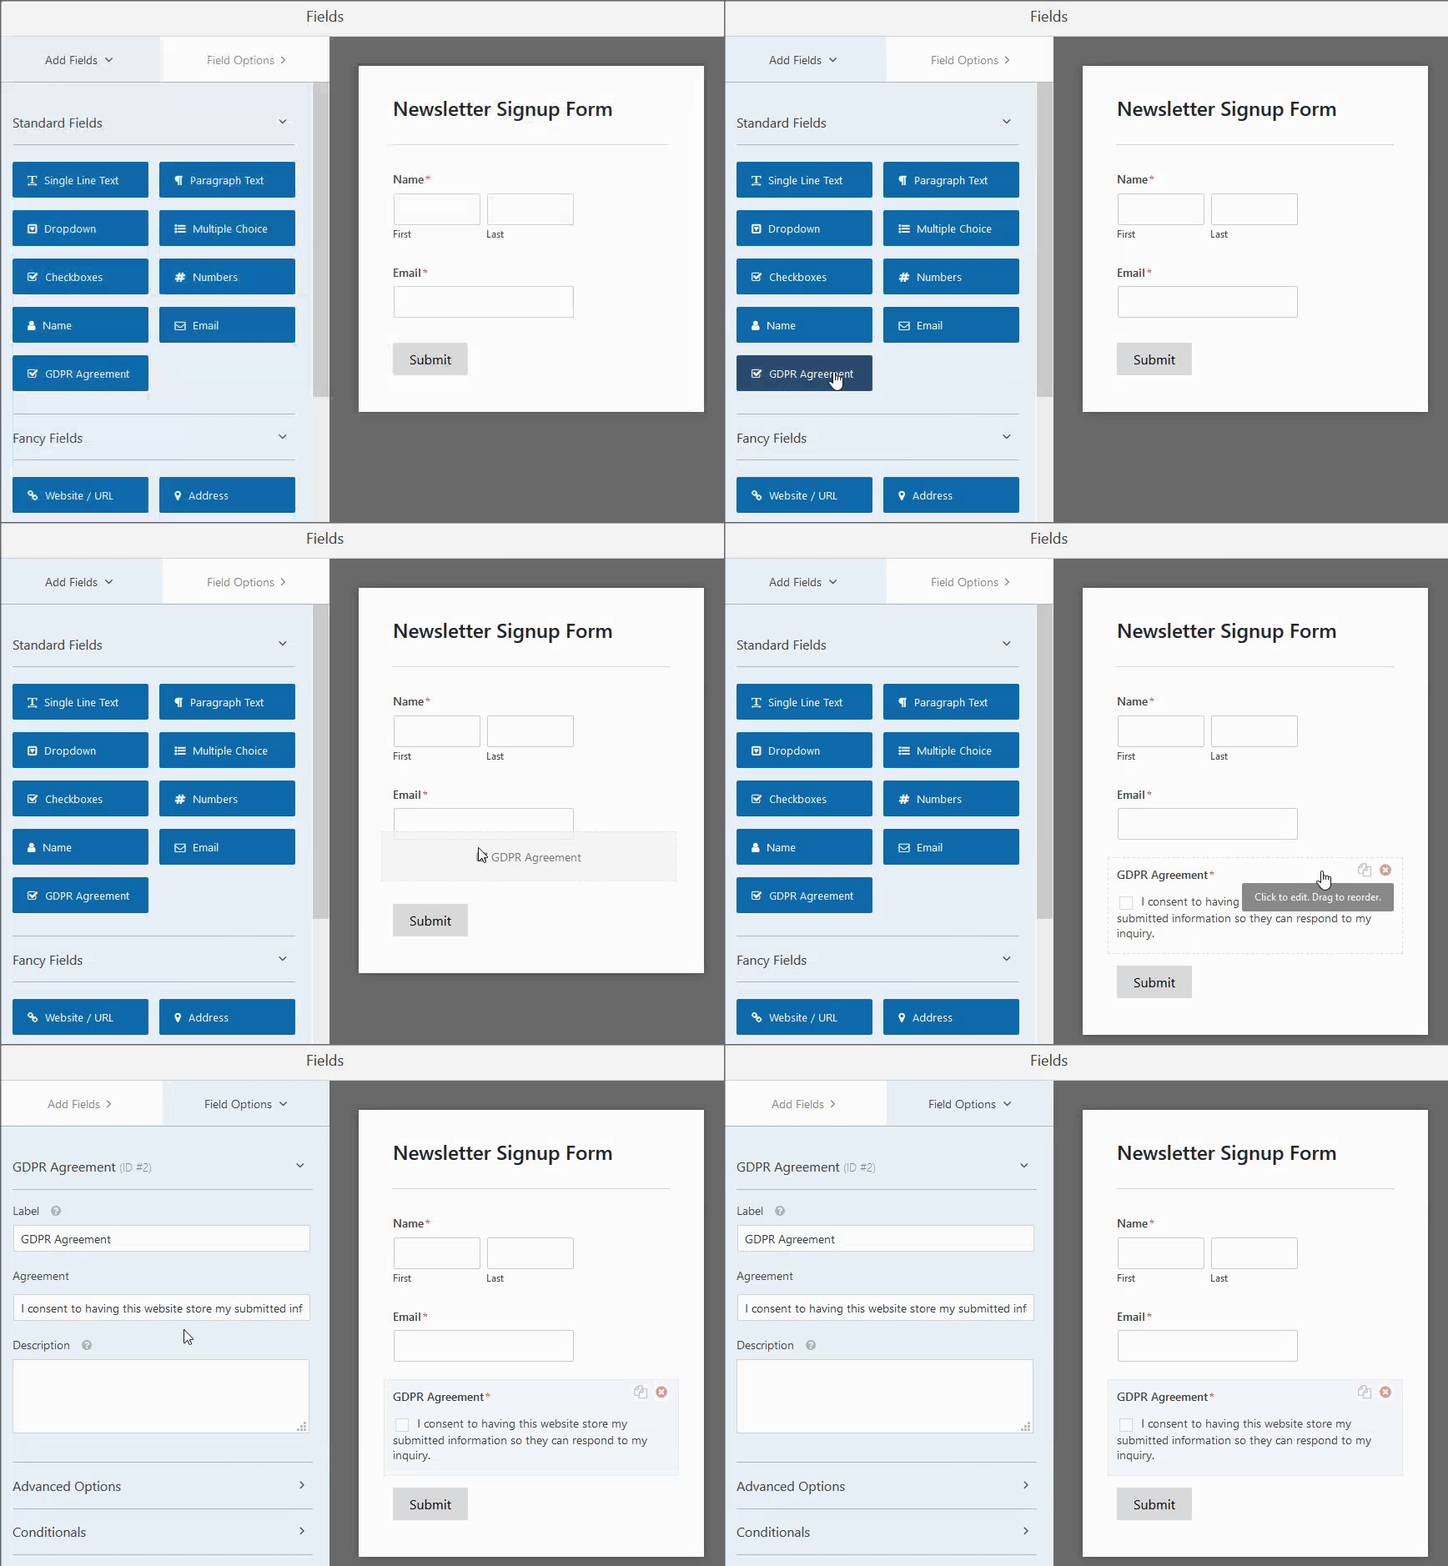
You can then enable the GDPR enhancement features at WPForms > Settings. This allows you to disable user cookies, user details including IP addresses and User Agent data, and access the GDPR form field.
Step 2: Connect Your Form To Mailchimp
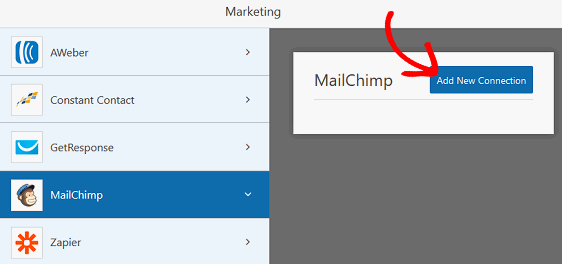
In the next step you have to connect your form with Mailchimp. But don’t worry, it’s very easy! Navigate to Marketing > Mailchimp and click Add New Connection.
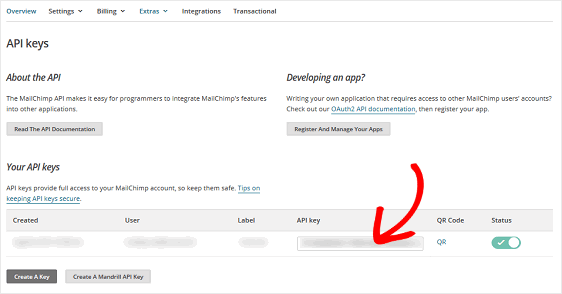
After giving this connection a name (for internal reference only), you can then add your Mailchimp API key. To do so you would have to sign in to your Mailchimp account and head over to Your Profile > Extras > API Keys.
Then copy and paste your API key into the WPForms settings and confirm the new connection. Once you have done this, you can select your Mailchimp account, choose an email list, and match the form fields with the Mailchimp via the dropdowns. Optionally, you can enable conditional logic and the double optin option.
Step 3: Configure Subscribe Form Notifications
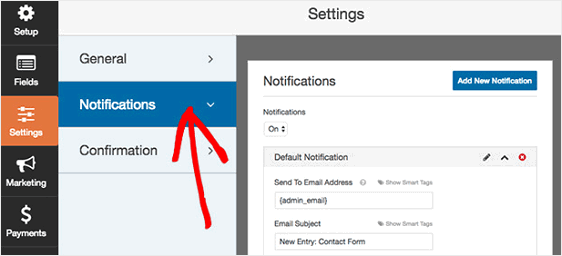
When your registration form is submitted on your website, both you (default) and your team members can receive a notification by email. For the latter, you only need to add their email address to the Send to Email Address field. By using smart tags you can even send a form notification to your new newsletter subscriber.
Step 4: Configure Subscribe Form Confirmations
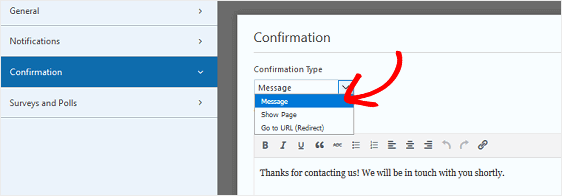
You can choose from three different types of confirmations
- Message: Show a simple message after a user has submitted a form.
- Show Page: You can take your site visitors to a specific page such as a Thank You page.
- Go to URL (Redirect): Send site visitors to a different website.
Step 5: Add Subscribe Form To Your Site
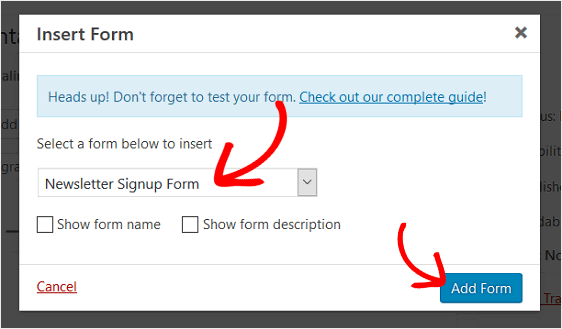
In the last and final step, you would need to add your newsletter subscribe form to your WordPress site to posts, pages, or sidebars (as a widget). For the post / page embed option, simply click Add Form and select the newsletter signup form in the dropdown to add it to your site. Et voilà, you are now all set to increase your email marketing list with WPForms and Mailchimp.
WPForms – The Beginner Friendly WordPress Form Builder »
Biff Codes - The Job Board for WordPress Devs
Biff.codes is on a mission to revolutionize job boards. Post and find WordPress developer jobs for free.
FTC Disclosure: We may receive a payment in connection with purchases of products or services featured in this post.






Add your first comment to this post