Curated blog with news, events, listings, jobs and exciting stories about web design & web development.

How To Create A Money-Making WordPress Membership Site
What about your New Year’s resolutions? Lose weight, exercise more and finally get started on projects that have been put on the back burner for a long time? Unfortunately, we can’t help you with the first two, but we can explain how you can get started with a great WordPress membership site.
Create Awesome WordPress Membership Sites »
WordPress Membership Site
To cut a long story short: Creating a membership site is not rocket science. All you need is a WordPress installation and a great membership plugin. For this, we would always go for a premium version. Of course, for cost reasons you can use a completely free plugin at first, but in the long run this is the worst possible solution. What happens, for example, if you are super successful and manage to get your site off the ground – and then the developer of the free plugin stops development or simply takes too long to fix bugs? Unfortunately, this happens more often than you think. That’s why we always recommend the use of paid premium plugins or so-called freemium plugins.
Like MemberPress, for example. The WordPress membership plugin can be downloaded for free and the functionality can be extended later with add-ons if needed. MemberPress offers a huge range of add-ons and features such as Content Dripping, Gifting, and Online Courses for instance. It also allows you to restrict content, set up tiered pricing plans, and accept payments via PayPal, Authorize.net, and Stripe. Their Stripe Checkout plugin now also supports Apple Pay and Google Pay as well as Link by Stripe! With Link, you can create one-click payments for any product or service on your website. Simply share your link anywhere online, so your customers can make a purchase in seconds.
Benefits
Before we look at how to create your site in four easy steps, let’s take a quick look at the benefits. A membership site is a closed website that offers its members exclusive content via memberships. These can be offered for free, for a fee or in a tiered pricing system.
The latter two options in particular allow you to monetise your site – as long as you offer interesting content that your users are willing to pay for. You can also present it as an additional revenue stream for sites that are already generating revenue, such as e-commerce shops.
With free memberships, you can collect user data and then use it for your marketing or advertising strategy. Obviously, the more you know about someone, the easier it is to promote products and services to them.
Memberships also encourage visitors to return to your website as they can engage with other members, share their knowledge and experiences, and more.
1. MemberPress Setup
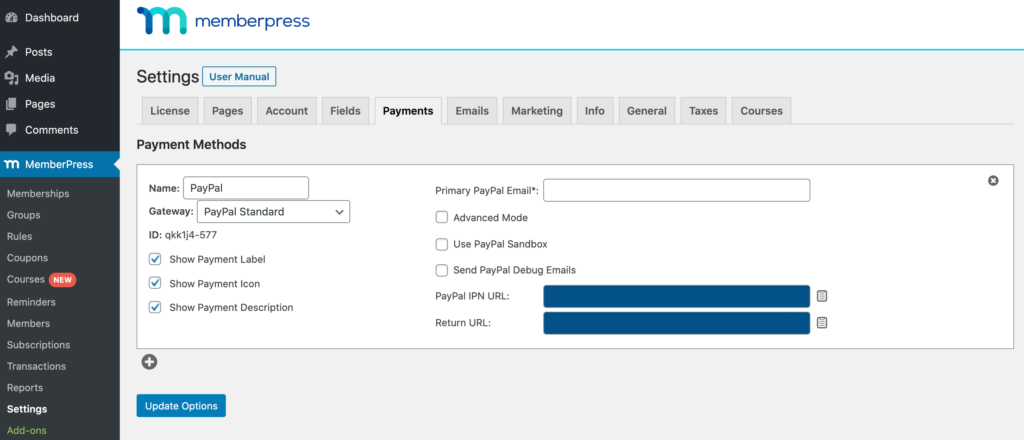
After installing WordPress on your staging environment or server, you can install MemberPress. This will allow you to turn your WordPress site into a fully-fledged membership platform.
Once you have activated MemberPress, you can configure the plugin as per your needs at MemberPress > Settings. If you intend to monetise your membership site, you should also set up at least one payment gateway on the Payments tab.
2. Membership Level Configuration
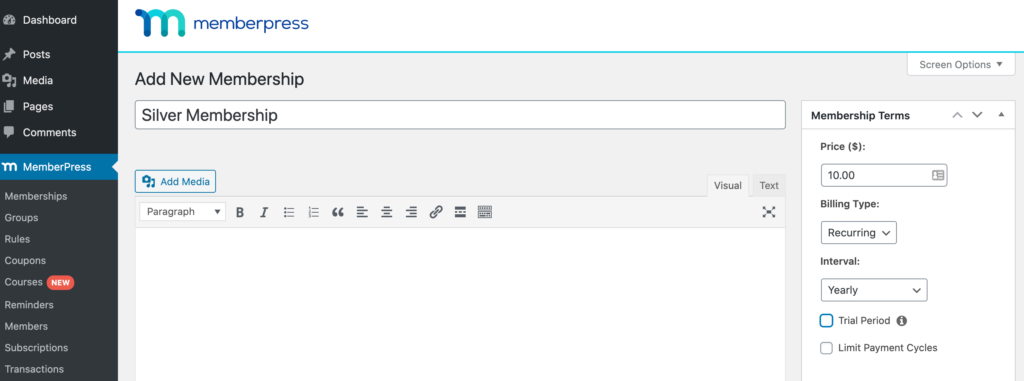
To set up your first membership, go to MemberPress > Membership > Add New. This is where you can give it a name and set the price.
You can also decide at this point whether this membership requires a one-off payment or has an expiry date when it needs to be renewed. Recurring memberships will result in ongoing revenue, but lifetime memberships can be an attractive offer – especially if you’re just starting to build your member base.
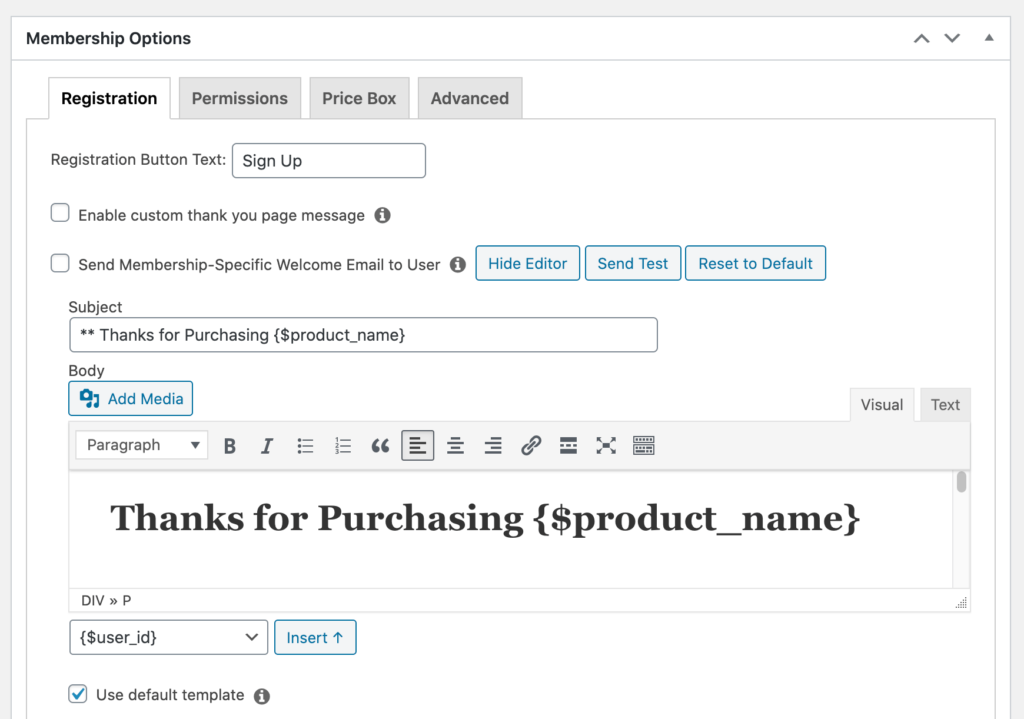
Once that is done, you can create custom welcome email by using MemberPress’ built-in email template and editor. You certainly want to make a good first impression, don’t you? Finally, you can publish your first membership. Simply repeat above steps to create multiple membership levels such as Bronze, Silver, and Gold.
3. Members-Only Content
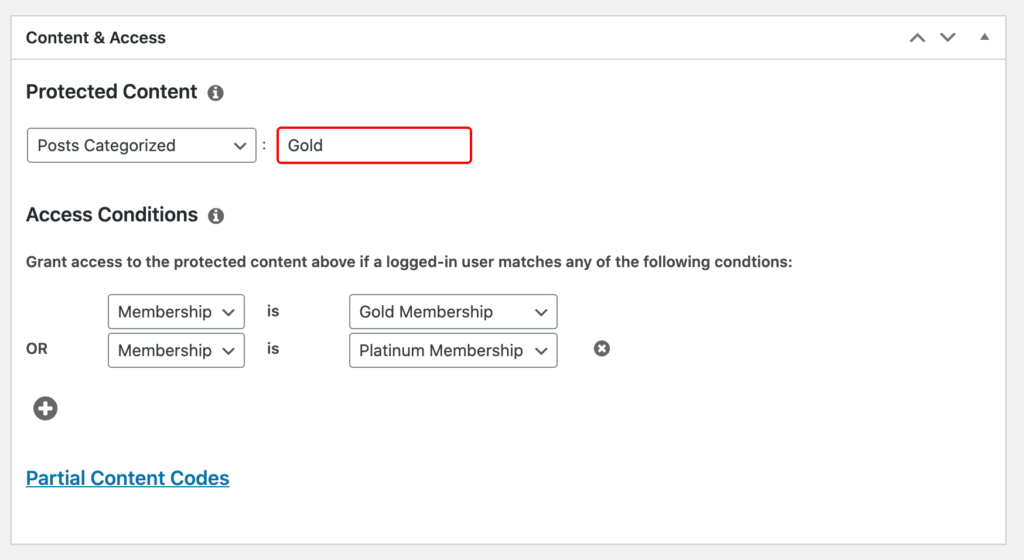
As noted above, the key to converting visitors into paying members is to offer them something of value. This can be, for example, blog posts, exclusive products or online courses that are only accessible to members.
You can restrict access to this premium content very easily with MemberPress rules and access conditions. For example, you can restrict access to a specific tag, category or even individual pages and posts.
To get started, head over to MemberPress > Rules > Add New. Here you will find a set of drop-down menus that you can use to create your rules.
Select Membership in Access Conditions and assign one or multiple membership levels to this rule. Only members with the assigned membership will then be able to access the content.
4. Pricing Page
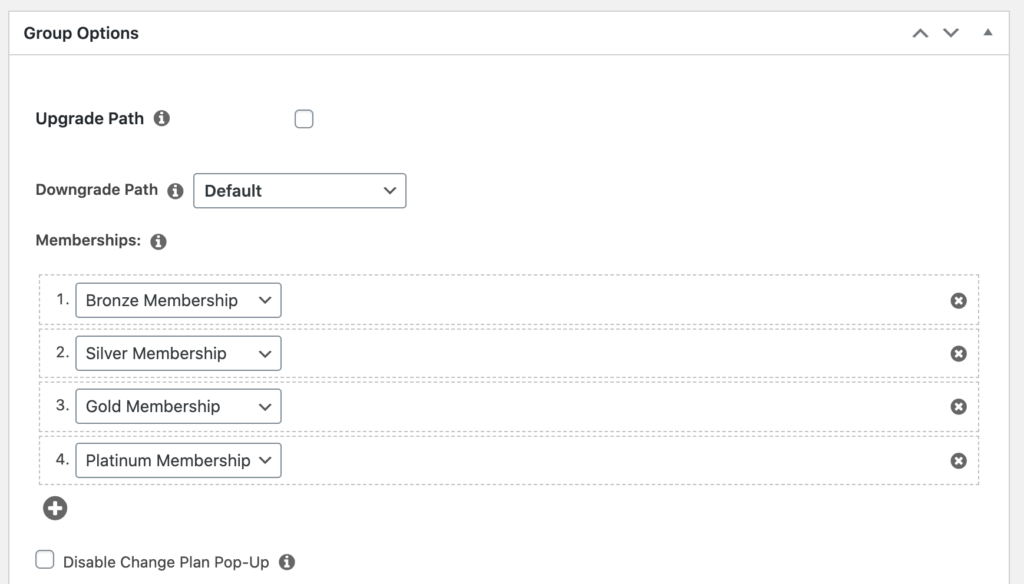
A pricing page helps site visitors compare your membership plans and choose the right one for them. By highlighting its additional features and benefits, it can also encourage visitors to upgrade to a more expensive plan.
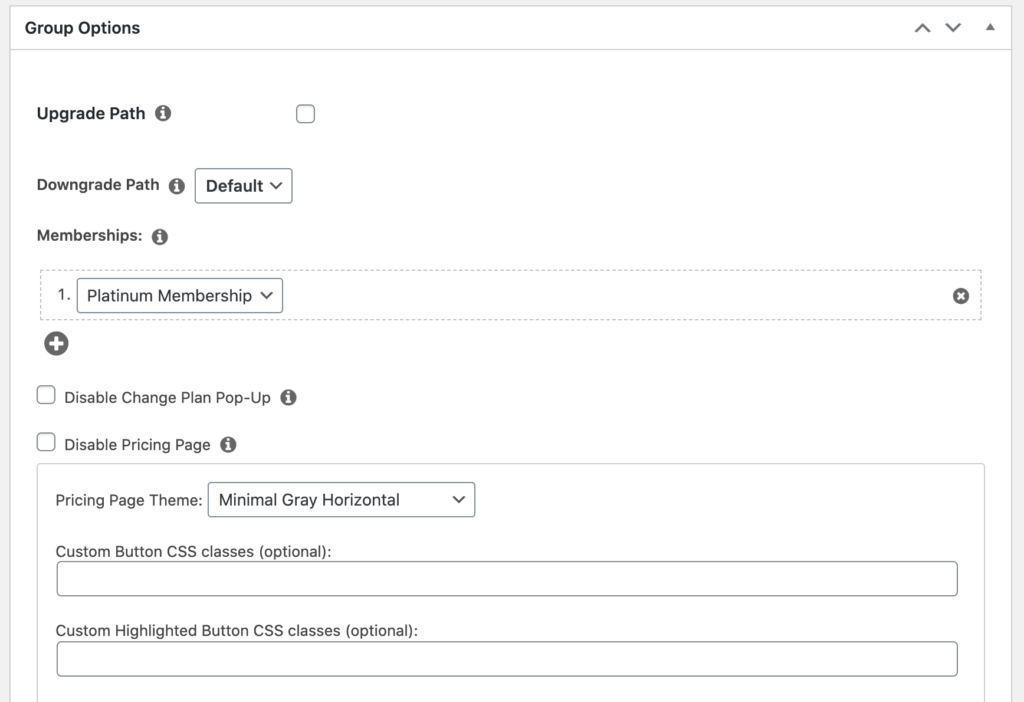
Simply go to MemberPress > Groups > Add New, give your group a name, and scroll to the Group Options section. Here you can then assign memberships to this page by clicking on the plus icon. The order of the plans can easily be changed via drag and drop.

In the Pricing Page Theme dropdown you can then choose a theme and publish the page.
More Must-Have Plugins & Themes
Speaking of themes, you might want to have a look at BuddyBoss which allows you to create a powerful online community. You might also want to install a SEO plugin. Here we always recommend SEOPress that has a great value for money. What other plugins would you install to build an awesome online membership website? Leave them in the comments section below!
The Fair Freelancer Marketplace
Freelancers, would you like to win 1 of 5 free business profiles for life? Sign up to enter the competition.
Ahoi.pro, the new fair freelance marketplace is about to launch! Sign up to be among the first to be notified!
FTC Disclosure: We may receive a payment in connection with purchases of products or services featured in this post.
