Curated blog with news, events, listings, jobs and exciting stories about web design & web development.

How To Create A WordPress Order Form In 5 Simple Steps
Do you sometimes wake up in the middle of the night and have that one brilliant business idea? The idea that brings you one step closer to your dream of never having to work again. We do not want to take away your illusions, but that will never happen. Never! The more successful you are, the more you have to work. But one can dream, right? If it’s related to ecommerce, you can and should first try to implement this idea on a small scale. That is, a simple online order form by using WPForms instead of a full-fledged online store based on WooCommerce for instance.
WPForms – The Beginner Friendly WordPress Form Builder »
Order Form
Order forms are necessary for selling any products or services. To make it simple, WPForms offer an Order Form template that can easily be customized to fit your needs. It also allows you to accept payments online – either via Stripe, Authorize.Net, or PayPal. Note that a WPForms Pro license is required for this feature.
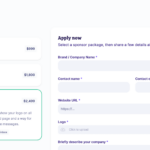
- Step 1: Create a simple order form by installing WPForms, the drag & drop WordPress form builder plugin. Then create a new form at WPForms > Add New and select the Billing/Order form template. In the Available Items section you can add items along with prices. Similar to online shops, you can also upload product images by clicking on the Use Image Choices checkbox in the form editor.
- Step 2: Configure your form notifications at Settings > Notifications. This way you can send yourself or a team member an e-mail notification so that no order will be missed. By using smart tags you can even send an order notification to your customers. You’ll find them in the Send To Email Address field. Simply click on Email and WPForms will send a notification to your customer’s email address. Next you can customize the email subject, “From Name”, “From Email”, and “Reply-To” emails, and add a personalized message along with the
{all_fields}smart tag to include all the information of the submitted order form. - Step 3: Configure your form confirmations at Settings > Confirmation that will be shown to customers once they submit an order form. You can either display a success message, redirect to a custom (thank you) page, or redirect your customer to a third-party website.
- Step 4: After installing the PayPal, Authorize.Net, or Stripe add-on you can easily configure the payments settings in the Payments tab of the form editor.
If you have paid attention, you will have noticed that there is still one step missing to finally accept orders online. In step 5 all you have to do is insert the order form into your WordPress site. Simply add the form to a WordPress page via a Gutenberg block or as a widget to a sidebar.
WPForms – The Beginner Friendly WordPress Form Builder »

Biff Codes - The Job Board for WordPress Devs
Biff.codes is on a mission to revolutionize job boards. Post and find WordPress developer jobs for free.
FTC Disclosure: We may receive a payment in connection with purchases of products or services featured in this post.


Add your first comment to this post